The post Why Customization Matters for White Label Reselling Success appeared first on SurveyTown.
]]>Customized white label reselling is key to making your new software work with your overall product offerings.
When using a white label software such as Survey Town, you want to customize it with your own branding. This is what sets you apart from just using our software for your customers.
In this article, we look at why customization matters for white-label reselling success.
It Makes It Part of Your Branding
The first thing you want to do when white labeling software makes it part of your branding. This is the most obvious reason customization matters.
By making your brand recognizable on our software for current and potential customers, you “own” the product as your own. It enhances your visibility with these customers and offers them something of value in addition to your other offerings.
It’s also quick and easy to customize software like our survey software. Once it’s done, you can integrate it into your own solutions with your brand identity and sell it as your own software.
It Enhances Customer Satisfaction
Another reason customization matters are because it increases customers’ overall satisfaction with your brand.
White labeling software shortens your time to market and gets the product into customers’ hands quickly. It also means customers can get what they need from you without having to buy something separately.
What’s more, white label software is already proven, so customers are ensured a great product. Once you’ve customized the software, you can rest assured that your brand is enhanced with tried and tested software labeled as your own.
You Make More Money
By customizing your white-label software, you are poised to generate more income right away.
Consider the marketing agency that offers a range of services, but they don’t offer survey software. They send customers away to purchase their own software, so they are missing out.
Conversely, the marketing group that has white-label reselling success is using someone else’s product as their own and customize it. They can offer it to their own customers without having to send them elsewhere.
You Attract Customers and Increase Retention
The final reason customization matters are it helps you gain and keep customers.
Your churn rate is less because you have more to offer your clients in the way of products and services.
When you use a proven white label solution and customize it as your own, you are more likely to attract loyal customers. Your customized solution helps you build stronger relationships with customers.
By knowing what your customer needs and wants, your customized white label solution is a great way to satisfy your customers. They have little reason to look elsewhere when you offer a complete package.
Final Thoughts
Customization matters for white label reselling success. You don’t need any special skills to add white label software to your repertoire of agency offerings.
All you need to do is join the program and customize the software with your branding and your logo. In fact, white label software is designed so you can customize it. All you need to do is customize the interface with your branding, and you’re set.
You don’t have to worry about creating the software. You simply customize to sell to current and future customers.
By customizing for white-label reselling, you are setting your business up for success. You’ve made it easy for customers to get everything they need in one place, and in turn, you watch your sales grow.
Surveys can help you give your clients what they need. Are you ready to get started with your Survey Town white label reseller account? Start with your account today.
Image: ÉMILE SÉGUIN  on Unsplash
The post Why Customization Matters for White Label Reselling Success appeared first on SurveyTown.
]]>The post A Quick Guide to Designing Your Survey Emails appeared first on SurveyTown.
]]>You’ve finished creating your survey, and you’re ready to send it out using SurveyTown’s email feature. Before sending the email out, you want your email to look like your brand and to customize the content in the email. When sending out a survey with this email feature, you get the opportunity to design an email that reflects your brand. This feature ensures that your customers will recognize that the email is coming from you, and they are more likely to respond to your survey.
In this article, we will cover SurveyTown’ts customizable email features in detail.
Getting Started
In the “Share” tab of the given survey you want to send out, you will see four options to share your survey. To send out your survey through email, you will find the first icon on the left is the “Email” icon. If this is the first time creating an email for the survey, just click on the Email icon. If you had previously started designing an email, click on the menu icon located in the top left-hand corner of the “Email” option and choose “Customize design”.This will open the email design page. l.
Designing Your Email
Once on the design page of your email, you will notice there are many options to customize your email. On the left-hand column, you will see that your customizable options are listed. In the center, you will see what your email looks like as you change the customizable options. As you customize these fields, you will notice your email’s design change before your eyes. Here is a description of the options you can customize.
On the left-hand side, you can set the “Brand/Product Name”, “Brand/Product Color”, and also the “Header” which can show your brand name or logo. Set your “Reply to” email and “From” name, and notice it will change at the top of your email. You can also set the email subject line in the “Subject” field and compose an “Intro message” to add some text to the body of the email.
The final two options on the left side allow you to set some survey automation. In order to stay on top of what your customer needs, you have the opportunity to send a “Recurring Email”. You can send “Recurring Emails” to customers if you want to email them once a quarter or once a year automatically to ask them their opinion.
In order to ensure your customers respond to your survey, you have the opportunity to send “Automatic Reminders” to customers that have not yet completed your survey. A reminder email can be set as early as 7 days, or as late as 21 days after sending.
Preview Your Email
Before sending out your survey through email, you can preview what it will look like to your customers. Quickly and easily see what your email will look like in desktop and mobile view. By default, your email will be shown in “Desktop” view. Above your designed email, you can switch between “Desktop” and “Mobile” view by selecting the associated tab.
Test Your Email
Once your email looks and sounds the way you want it to, you will want to see how it performs when you send it to your customers. You can do this by sending a test email. In the design section, you will find where to send a test email directly below your designed email. In the short text box, fill in the email address that you want to send a test to and click “Send”.
Final Thoughts
Designing your email that reflects your brand is essential to gaining more responses to your survey. SurveyTown’s email feature allows you to design the look of your email, establish who it’s from, set a reminder and recurring emails. You also have the option to preview and test your email. When your customers receive your survey in their inbox, they will instantly recognize your brand and will be more likely to respond.
The post A Quick Guide to Designing Your Survey Emails appeared first on SurveyTown.
]]>The post Admin API Calls launched, Logic and Action Emails get an upgrade and Pricing changes appeared first on SurveyTown.
]]>
Admin API
If you are a white-label partner, you may need to create accounts on the fly. For example, let’s say you are a SaaS provider to small businesses, and you wanted to a provision a new survey account for each one of your merchant customers when they signed up for you SaaS service. With our Survey Admin API, using your API key, you can create new accounts immediately, setting up all the accounts preferences and give your customer access right away.
But there’s more! In addition to creating, updating and deleting accounts, you can also create API Keys, find all your accounts and set messages that appear in the platform when the users login.
Here’s the list of new functions:
- Admin_Create_Account
- Admin_Update_Account
- Admin_Create_Account_Key
- Admin_Get_Account_Key
- Admin_Get_Accounts
- Admin_Find_Accounts
- Admin_Suspend_Account
- Admin_Reinstate_Account
- Admin_Send_Message
To gain access to the Admin API, you will need to have signed up for NPS white-label account and then you use an API key that is associated with it.
Logic And Actions Email Upgrades
If a customer service issue is uncovered when a customer takes a survey, you may want to notify customer service personnel right away. SurveyTown allows you to send alert emails to business managers right away in our “Logic and Action” section of the survey. This feature has been around for a while. What’s new is that we now allow you to customize this email to give all the details of the responses on the page in the email itself. So your manager can find the information they are looking for without having to login and see it.
To find this functionality, go the “Logic & Actions” tab underneath the “Questions” tab for survey, set how you want the email to be triggered and then check the “Email Alerts”. Here you can see we have pre-filled the subject and body with the details of the response. You can then customize it from there.

Branding
We added a new “Branding” field in the “Settings”. Use this for the name of your product, company or service. It will show up in the following areas:
- It will used in new NPS, CSAT, CES or Ratings questions by default but can also be edited and customized if you want.
- It will be used as the “From” name in any emails that are sent out by the system, such as Confirmation or Notification emails.
Pricing updates
We made a big change to how we price our product. Now, we price based on the number of responses that are received rather than the number of features that are used. We think this more closely aligns with the value we are providing. Smaller customers can pay a little less while larger customer pay a little more.
Our API access is limited to our pay customers, but for developers we have a 14-day free trial to use the API to make sure it works for you.
Thank you and happy surveying!
Surveys help you make the best decisions for your business. Are you ready to get started with your free Survey Town trial? Start with your free survey account today, and you can upgrade at any time.
The post Admin API Calls launched, Logic and Action Emails get an upgrade and Pricing changes appeared first on SurveyTown.
]]>The post New and Improved Look of NPS, CES, CSAT surveys for Mobile, Desktop, and Email appeared first on SurveyTown.
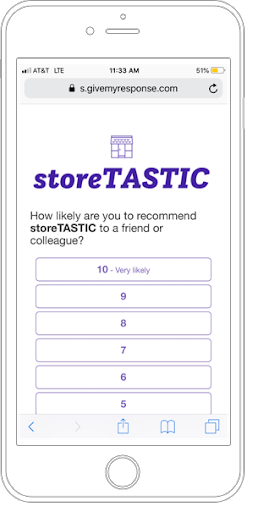
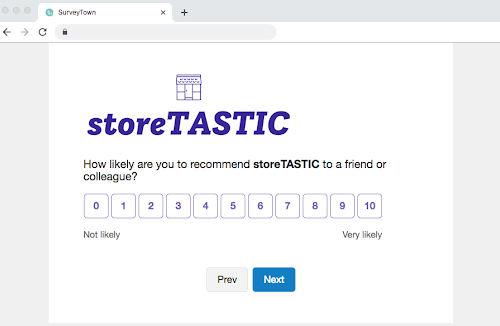
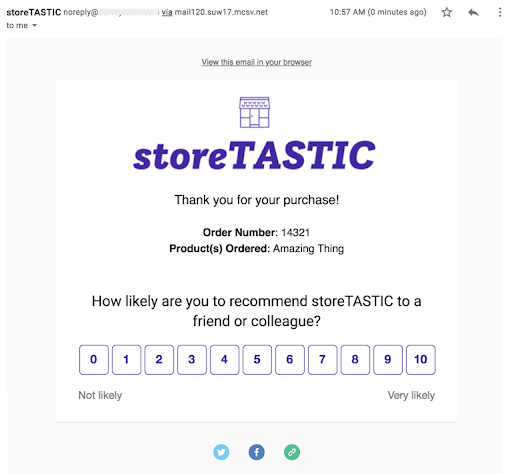
]]>A new and improved look of surveys for mobile, desktop, and email experiences
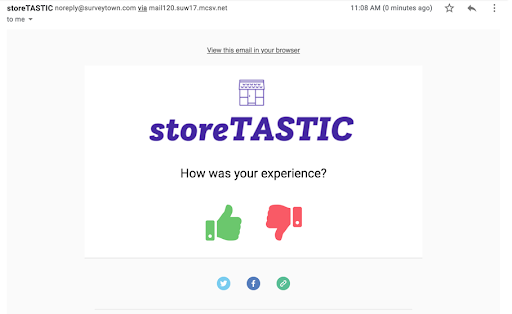
We’ve switched to a more modern look for our survey experiences. This new look is used for mobile, desktop, and email experiences and is a little more pleasing to the eye (or at least we think so). No matter where you’re sending your survey, you can be sure that it will look good and represent your brand well.
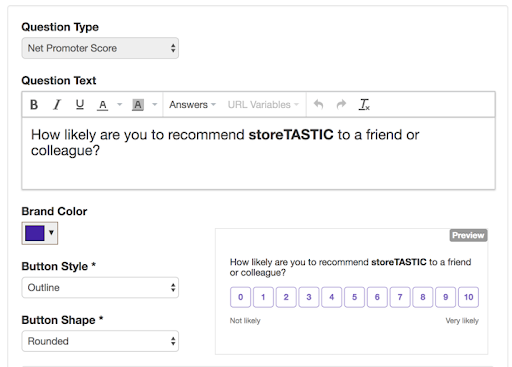
New question preview during build mode
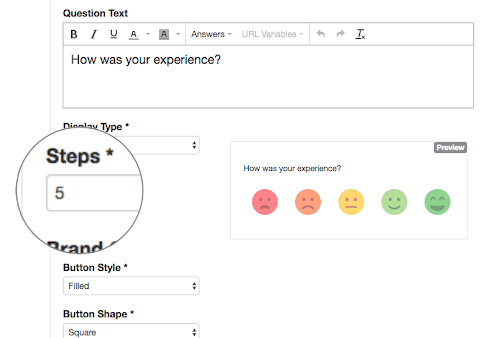
Now you can see exactly how your question and style options will look during build mode so you don’t need to switch back and forth between build and preview modes.
Customize colors, shapes, and styles used in NPS, CES, and CSAT surveys
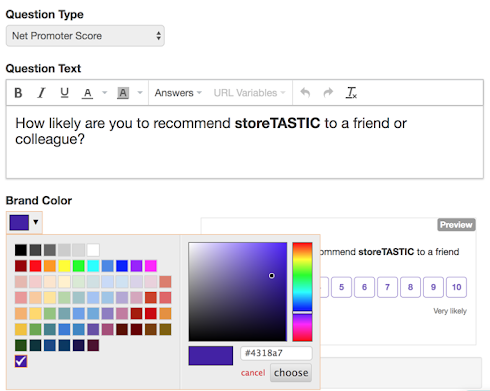
Branding is important. That’s why on top of making some changes to make our surveys look better, we’ve also added a number of options for you to customize your surveys. When building your survey, you have the option to change colors, shapes, styles, and more.
Choose your brand color
You can select a specific hex code, which makes it easy to keep your surveys on-brand. This also makes it easier for consultants and agencies to white label the platform and provide better branding options to clients.
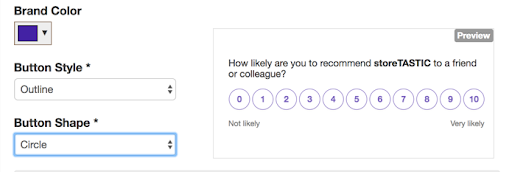
Change the button shape and style
You have more options for adjusting the look of the buttons. Select rounded buttons, circle buttons, or square buttons, then choose whether you want your brand color to just be the outline or to be the fill. All of these style options allow you to not only do something that you think looks better but also to create a survey that better matches your brand’s visual aesthetic.
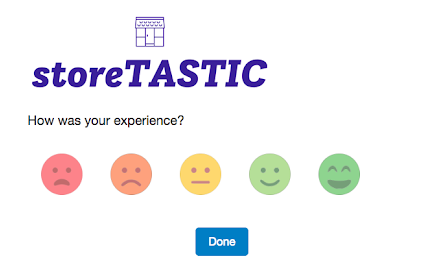
Rating questions can have thumbs, faces, or stars
Who said surveys and customer experience questions can’t be fun? Add the finishing touches to your questions with up and down thumbs, emojis, or stars. To make this feature a little easier to use, we’ve also added the ability to change the number of icons that appear. For the thumbs, you’ll want to choose two under the Steps dropdown. You can also choose to use four stars, three faces, or five boxes—whatever works best for you.
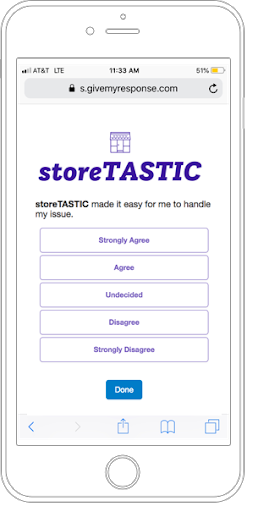
CES and CSAT answers can now be shown as text
In case you have something against numbers, we’ve made it so that you can use text on your CES and CSAT questions. Now you don’t have to worry about whether or not your customers are confused about whether or not 1 or 5 means strongly agree.
As a company that lives and breathes customer feedback, we’re always listening. We’ve been hard at work making changes that will help you build better questions faster so that you can focus more on analyzing the results. We hope you enjoy these new features!
The post New and Improved Look of NPS, CES, CSAT surveys for Mobile, Desktop, and Email appeared first on SurveyTown.
]]>The post Getting to your survey response data appeared first on SurveyTown.
]]>Aggregate data in graphs
We collect your responses and show you the response data in aggregate in our reporting page. Using filters, you can also slice and dice your survey data, re-arranging your view of your data using answers to previous questions. So for example if you asked your respondents their gender, you could then filter you results just to see graphs of the responses from men or women.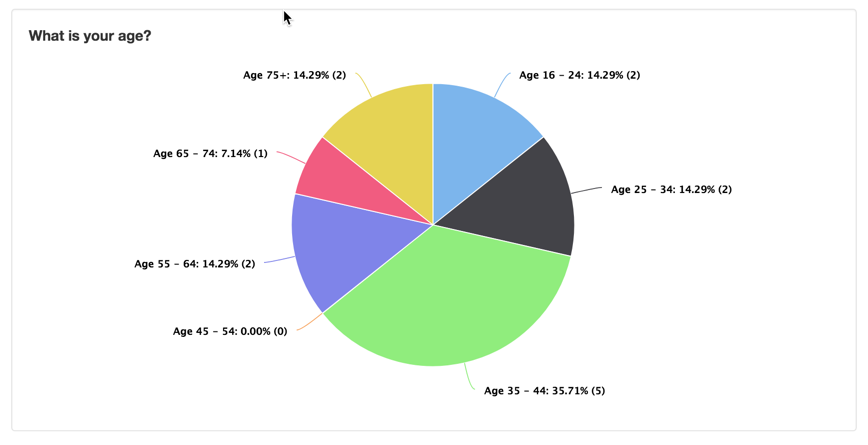
View in PowerPoint
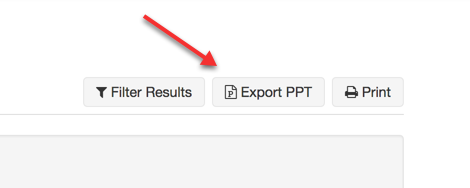
Many customers want to present their survey finding into PowerPoint presentations that they can then show to their collegues. We make this process easy with our feature to Export to Powerpoint by clicking the “Export to PPT” button at the top of the Reporting section of the survey.
View individual responses
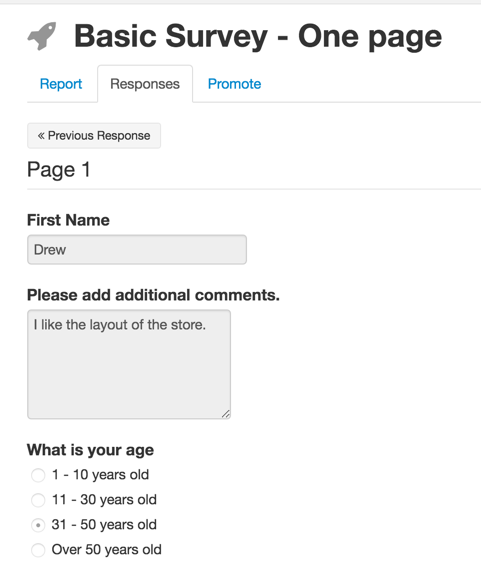
If you are interested in seeing any particular response we give you a “grayed-out” view of individual responses. First look at your list of responses and then click the “View” icon.
Download Comma-separated values (CSV) file
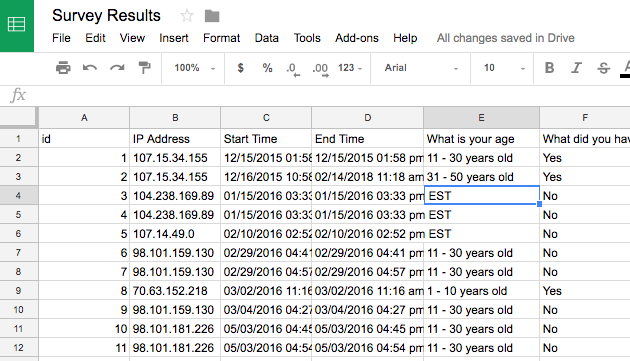
If you want to manipulate your data in Excel or Google Sheets, you can export all your response data into a CSV and then from there you can import into different systems to create your own reports.
Receive via Webhook
Survey webhooks are notifications that we can send to a listener of your choice via an HTTP POST when someone takes certain actions in their survey account. A listener is simply a script that lives at a URL that stands ready to do something with the information we send it. Then when a respondent completes a survey we notify the listener with answers to the questions. That listener can then “do something” with the data immediately, like add it to a CRM database. Webhooks are the best way for programs to stay in sync with each other in real-time.

Retrieve via API
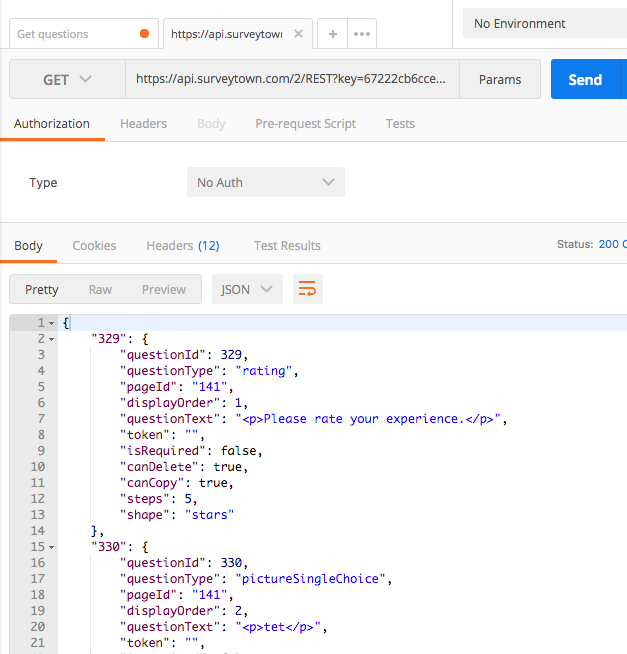
Unlike Webhooks which push information to you, our survey API allows you to retrieve you survey data “on-demand”. Get an API key from your account and connect to our service at https://api.surveytown.com/2/REST/ to retrieve your data in JSON format.
In sum, once your respondents start taking your survey, you can retrieve you data in a many ways. We strive to help you access your data in a way that is most useful to you at the time you want to get access to it.
The post Getting to your survey response data appeared first on SurveyTown.
]]>The post How to insert a survey question into an email appeared first on SurveyTown.
]]>See how to embed a survey question in an email.
This means that your question will show in the email itself, allowing your customer to one-click in the email and give their response.
There are four types of question types that you can embed into your emails.
- Rating
- Net Promoter Score
- Radio
- Picture (choose one)
The process of embedding is to go into the “Promote” tab, and then clicking on “Questions” from there you can copy and paste the HTML that you can embed into an email.
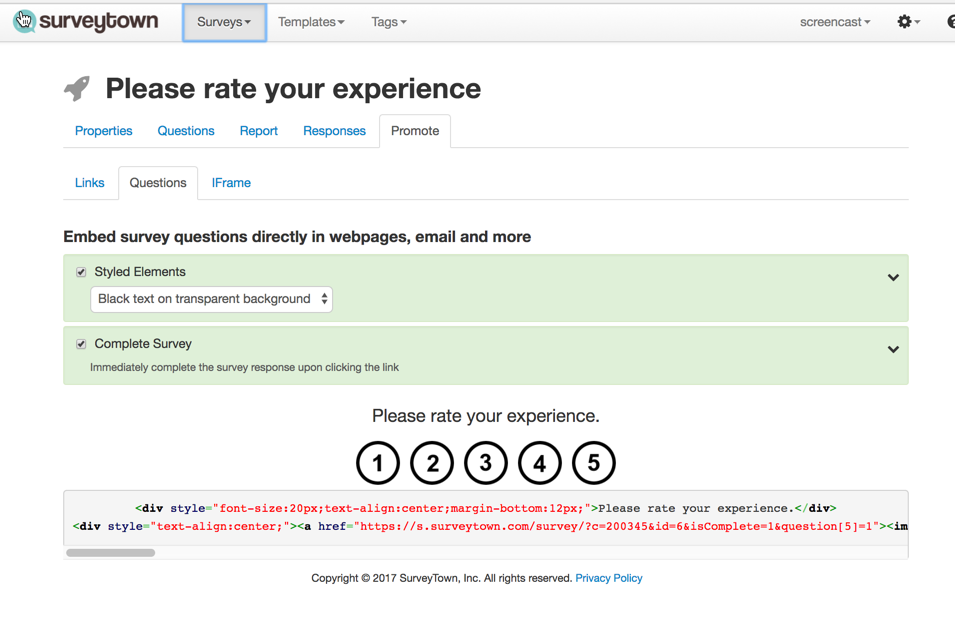
We created a full video that guides you on how to put the HTML into an email.
Happy Surveying!
The post How to insert a survey question into an email appeared first on SurveyTown.
]]>The post Alerting customer service by email to negative reviews automatically appeared first on SurveyTown.
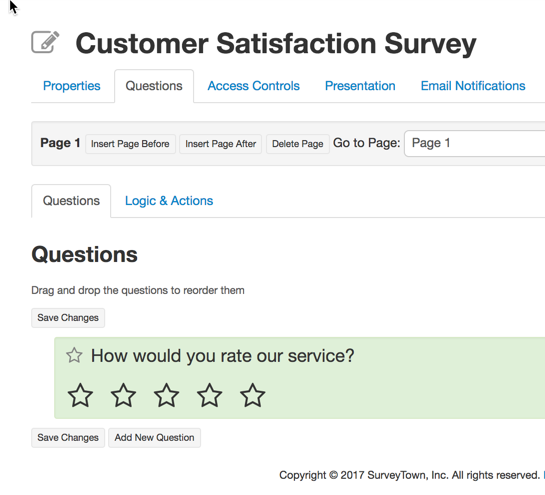
]]>Let’s assume that you are creating a ratings question of stars 1 to 5 and wanted customer service to be alerted by email if anyone rated their experience less than 4 stars.
First create your question
Step 1 is to create your customer service question. In this example, we are using a simple ratings question – “Please rate your experience.” and we give the customer a choice of 1 to 5 stars.
Second, create an “Action”
Under the “Logic & Actions” tab, click the button to “Add New Action”. The action we are creating is to send an email when a someone rates the question as less than 4 stars. So the next step is to create the condition.
Third, define the condition
Add a Condition
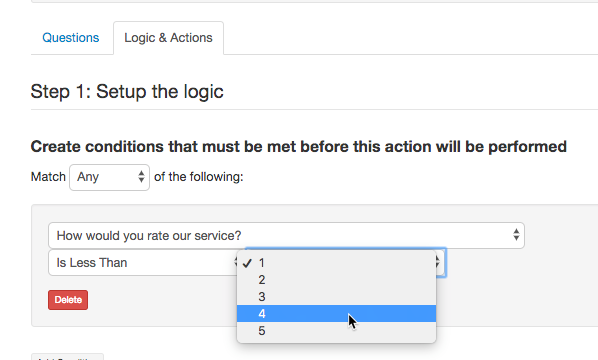
Press the button that says “Add a Condition” and defein the condition of “How would you rate our service?” is less than “4”.
What this means is, if someone rates their experience as less than 4 stars your action will be triggered.
Set the Alert email recipient
Now set the “Alert Email” which means put in the email of the person or the group that you want to receive the email alert.
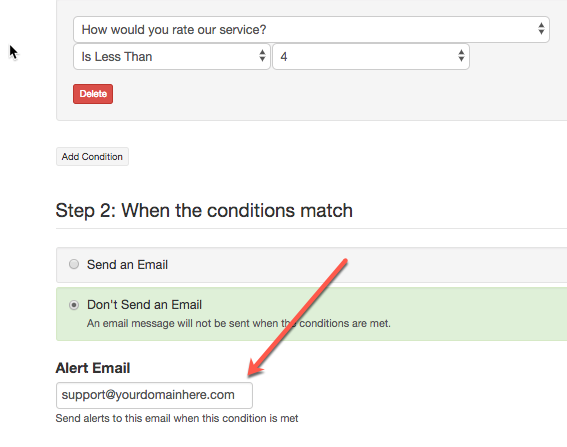
Save the logic an action and then you are done.
Using the “Preview” you can test our your new functionality. If you have set things up correctly you will get an email when take the survey and give it less than 4 stars.
The email you get will contain the condition that was met. It will also contain a link to be able to click on and see the full response.
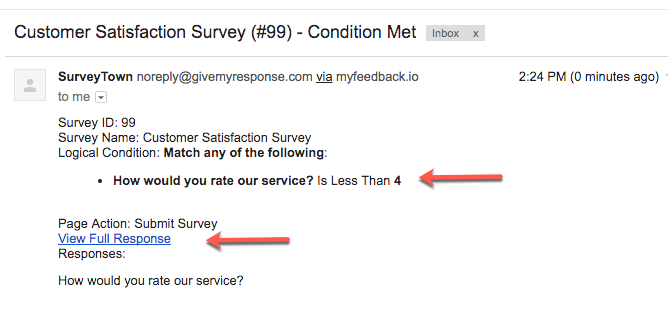
If you have asked for the customers phone number or email or if you have passed this data along to SurveyTown when you passed the customer onto us then you can find that information and followup with the customer.
That’s it. Happy surveying.
The post Alerting customer service by email to negative reviews automatically appeared first on SurveyTown.
]]>The post Example code for PHP Webhook Endpoint appeared first on SurveyTown.
]]>SurveyTown has survey webhooks that allow you to receive notifications when different events happen inside your SurveyTown account. Why would you want to receive these notifications? So a common use case would be if you wanted to update a separate systems when someone completed a survey, you could receive a webhook notification from SurveyTown when the survey was completed and after receiving that information you could then do something with that data such as update a CRM record, for example.
Webhooks themselves are an HTTP post notifications. To the non-technie, the notification itself just looks like a bunch of code. But buried in the code is all the details about the event. In the case of the RESPONSE_CHANGED webhook for example, the POST includes all the answers the respondent gave to the questions in the survey.
When setting up a webhook, you provide a URL where the information will be sent when the event happens – this is called the “endpoint” or the “listener”. But at that endpoint, there needs to be some code that “consumes” the information SurveyTown sends and does something with it. We thought it would be fun to give an example code that takes our RESPONSE CHANGED webhook and makes a CSV out of it responses. Why? Perhaps this CSV could then be downloaded into other business intelligence software for example. But turning the information into a CSV is just one example you could do. You could do a myriad of different things once you have the data.
So here is the example code, written in PHP that when notified by our RESPONSE_CHANGED webhook creates a CSV. It should be noted that you could modify this script to change the response data into any format you need – like XML or JSON. You could even skip saving to a file altogether and pass the data directly into a database or another process. But without further ado, here’s the code:
Example Webhook Endpoint Written in PHP that uses the “RESPONSE_CHANGED” webhook to create a CSV
<?php
// Verify the webhook origin by checking for the Webhook Key value you defined in SurveyTown
if( empty( $_REQUEST['key' ]) || $_REQUEST['key'] != "amazinglysecurekey" ){
 http_response_code(200);
 die();
}

// Look for the response_changed webhook event. Make sure the response is complete before processing.
if( $_REQUEST['type'] == "response_changed" && ! empty( $_REQUEST['response'] ) && $_REQUEST['response']['isComplete'] == 1 ){

 $columns = false;

 // Use a different CSV file for each survey
 $filename = "survey_responses_{$_REQUEST['survey_id']}.csv";

 // Create the CSV header if the file doesn't exist
 if( ! file_exists( $filename ) ){
 $columns = array(
 "ID",
 "IP Address",
 "Start Time",
 "End Time"
   );
 }

// Add response meta data
 $response = array(
 $_REQUEST['response']['responseId'],
 $_REQUEST['response']['ipAddress'],
 $_REQUEST['response']['responseStart'],
 $_REQUEST['response']['responseComplete']
 );

 // Loop through all the response data
 foreach( $_REQUEST['response'] as $key => $res ){
 // Questions will have integer keys
 if( is_int( $key ) ){
 // Handle multi value questions
 if( isset( $res['responses'] ) ){
 foreach( $res['responses'] as $choice => $value ){
 if( $columns ){
 $columns[] = strip_tags( $res['questionText'] ) . " ({$value['choiceText']})";
 }
 $response[] = $value['responseValue'];
 }
 // Handle single value questions
 }elseif( isset( $res['response'] ) ){
 if( $columns ){
 $columns[] = strip_tags( $res['questionText'] );
 }
 $response[] = $res['response']['responseValue'];
 }
 }
 }

// Open and write to the CSV
 $fp = fopen( $filename, "a" );
 if( $columns ){
 fputcsv( $fp, $columns );
 }
 fputcsv( $fp, $response );
 fclose( $fp );
}

http_response_code(200);
Happy surveying!
The post Example code for PHP Webhook Endpoint appeared first on SurveyTown.
]]>The post Pre-selecting choices for respondents appeared first on SurveyTown.
]]>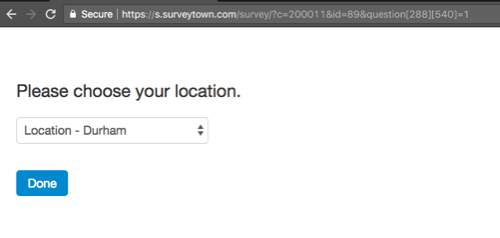
How it works is that you add the pre-selected responses into the URL. For example …
https://s.surveytown.com/survey/?c=200011&id=89&question[288][540]=1
This would pre-select choice “540” from question “288”.
In this case for this particular survey it means “Durham” would be pre-selected from the dropdown for location.
So how can you find the particular choices and question ids?
You can get them by viewing the HTML source of the survey you published.

Or you can get them by querying our API.
For a complete walk through of the options and how to set them up, please see this help article.
Thanks and happy surveying!
The post Pre-selecting choices for respondents appeared first on SurveyTown.
]]>The post 10 Reasons to use SurveyTown instead of SurveyMonkey appeared first on SurveyTown.
]]>SurveyMonkey is a great tool and we admire them in many ways. But if you are in the market for a survey builder, here are some reasons you might want to take a look at SurveyTown instead.
1 . Customize Your Success Pages with Images
When your respondents finish the survey, you may want to thank them or show your own social media icons to allow them to share their experience with their friends. In SurveyTown you can customize your survey success pages with images or icons. Upload them and we will host them for you!
2. Monthly Commitment
Don’t get us wrong, commitments can be good. But SurveyMonkey walls off lots of functionality unless you pay for an annual account. At SurveyTown, we don’t have this limitation. You get full access the functionality of your account with only a month-to-month commitment.
3. Obsessed with Customer Service
We are small (for now) and obsessed with customer service. Working with SurveyTown you get access to a small dedicated team that is devoted to customer service and ready to collaborate.
4. Survey Personalization
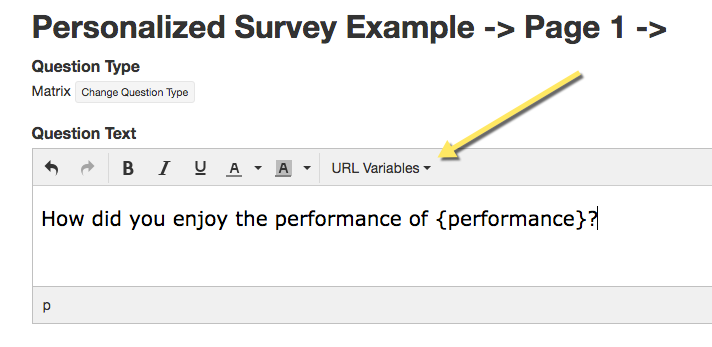
With our URL Variables, you can create questions that address the survey taker specifically. For example, “George, please rate your experience” or “How did you enjoy the performance of ‘Wicked‘?”. In both examples the question text as been customized to the survey taker given who they are or what they have purchased, which increases response rates.
5. API Access for 30% less
Looking for a survey partner you can integrate with. Our API is robust and includes Webhooks. Also, we give Direct API Access at our Professional Account level which is $70 (instead of SurveyMonkey’s $99) and does not require a yearly commitment.
6. Embed Survey Questions in Emails sent from any Email Service Provider
In SurveyTown, we give you the code that you can use to embed survey questions in emails you are sending out. So you can put them in emails generated by Campaigner, Bronto, Mailchimp or any other Email Service Provider. You can also embed them in custom emails you maybe generating or sending out via other applications.
7. Enterprise-Grade White-label
SurveyTown is a great fit for agencies because in addition to giving you an “unbranded” URL to host your surveys and allow you to customize success URLs, we also allow you to add your logo inside the application itself and to sell it as your own product to your customers. In addition, SurveyTown gives you the ability to manage multiple accounts through one administrative interface. For more info please see the blog post – the difference between white-labeling and white-label reselling surveys.
8. Tagging
SurveyTown has tagging instead of foldering which means you can label one survey with multiple tags which is tantamount to putting a survey in two or more separate folders at once. You can also add, edit or delete these tags via our API.
9. Additional Enterprise Users are only $20 a month
You can add additional “Enterprise” users inside of SurveyTown and share administrative privileges with them (or not) for $20 a month. An additional user at SurveyMonkey’s “Platinum” level will double the cost of your account.
10. Mobile Surveys – “Tap Your Phone, Take A Survey”
Want to improve your “in person” survey responses. Let’s us partner with you on “Tap Your Phone, Take A Survey”.
Feel free to create a SurveyTown trial account or to talk more or schedule a demo please contact us.
The post 10 Reasons to use SurveyTown instead of SurveyMonkey appeared first on SurveyTown.
]]>The post Question Numbering, Progress Bars, Survey Question Personalization launched appeared first on SurveyTown.
]]>I am please to let you know we have added some cool new features into SurveyTown that we hope you enjoy. Here’s a breakdown.
Progress Bar
For multi-page surveys, we have introduced a new survey progress bar that will allow you to show to survey respondents how far they are along on your survey. You can add the progress bar to the top or the bottom of the survey or both. You can also include an indicator for the number of pages completed and percentage of pages completed.

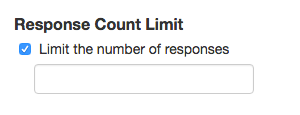
Response Limit
SurveyTown now as the ability to limit the number of responses for a give survey. This is especially handy for event registrations where you need to limit the number of responses because of venue size or other limitations.
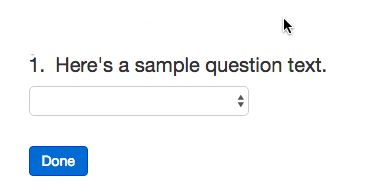
Question Numbering
Now you can automatically add numbers to your survey questions.
Survey Personalization
Imagine your name was “Doug” and you came to the survey and it say “Hi Doug, please rate your experience?” Cool, right? Well you can now personalize survey questions respondent by respondent using URL variables.
Question Text Editor
We have added the ability to bold, italicize or add color to your survey questions.
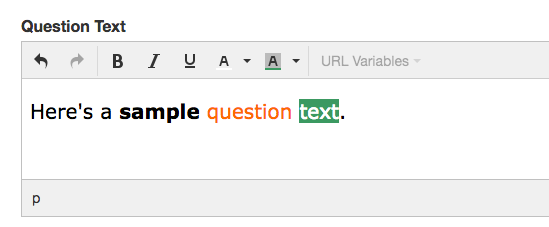
API calls to input and modify responses inside SurveyTown
We have added several new API calls that would allow a developer to add in responses to SurveyTown from another system. These means you can integrate surveys into any customer touchpoint and with the help of a developer, aggregate the responses inside of SurveyTown for results analysis.
Webhooks
We have added a “Response Changed” and “Response Deleted” to our survey webhooks so you can be notified programmatically when those events happen.
We hope you enjoy the new features and let us know your feedback at support (at) surveytown.com.
The post Question Numbering, Progress Bars, Survey Question Personalization launched appeared first on SurveyTown.
]]>The post Survey Overview gets an upgrade appeared first on SurveyTown.
]]>New Survey Overview
Let’s start with the survey overview changes. You should notice right when you login the a new look. The new survey overview page is aimed at make searching and finding new surveys faster and easier. Here’s a screenshot.
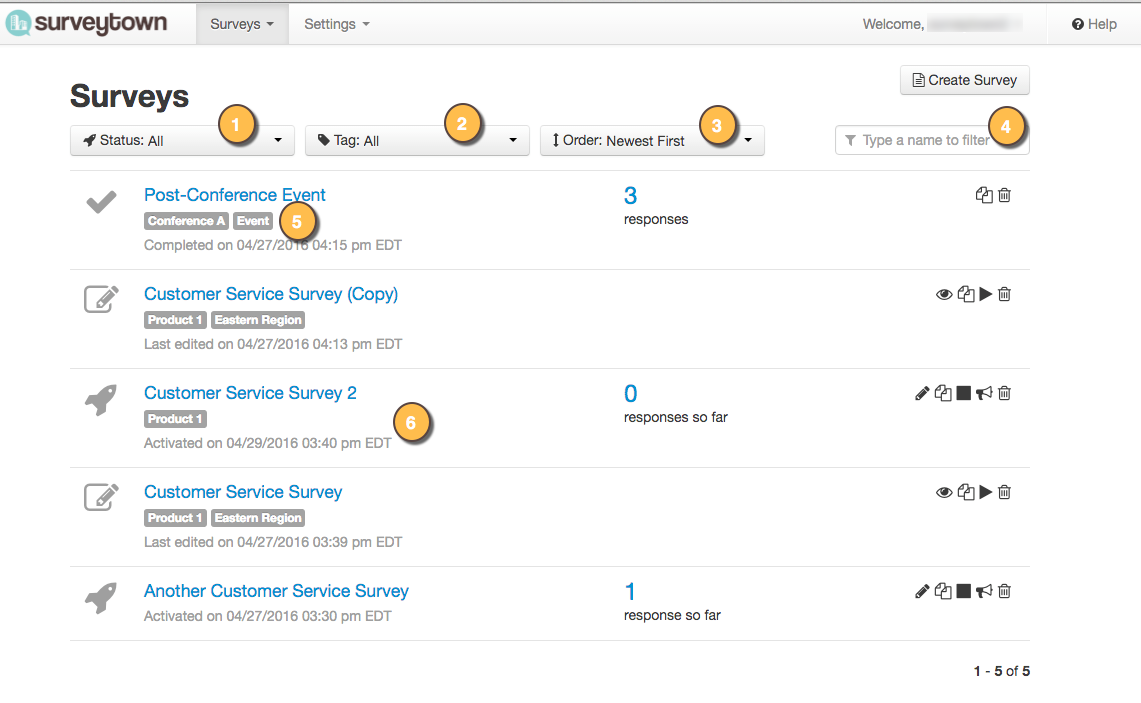
There are many changes to see here.
- First, all “Draft”, “Scheduled”, “Active” and “Completed” have been unified into one view. You can easily filter out and see surveys of one particular type using the “Status” dropdown at the top left. (1)
- We have introduced Tags as an organizational tool. (for more info on what tags are see below) You can filter for surveys that have been tagged with certain tags. (2)
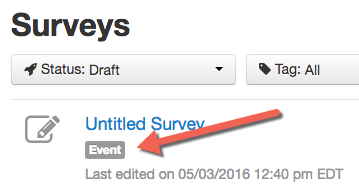
- Events tab has been replaced by the “Events” tag. If you had surveys that were event registrations, instead of finding them in a separate “Events” tab, they are now tagged as “Events”. (5) You can find them specifically by filtering for surveys tagged as events.
- Sort Alphabetically or by Date Created – We added a dropdown that allows you to sort your surveys based alphabetically or by the date they were created.
- Searching as been added – You can now search for survey names using the search box (4)
- Added relevant dates – We added into the view important dates depending on the type of survey you are looking at. So for Draft surveys, we now show the “Last edited” date, for Scheduled surveys we show “Scheduled” date, for Active surveys we show the “Activated on” date and for Completed surveys we show the “Completed On” date.
We also added icons that represent the different statuses of surveys next to the survey names.
For more help you can see our survey overview help page.
Tags
We added to the application the concept of tags. Tags are simply words you use to label surveys so you can easily group them together. Using them is kind of like putting surveys into folders except that Tags have the added feature of being able to add several of them to a survey. Once you tag surveys you can then filter for them on the survey overview page. (see above)
To creating a tag is simple. One way is to navigate from the top menu.
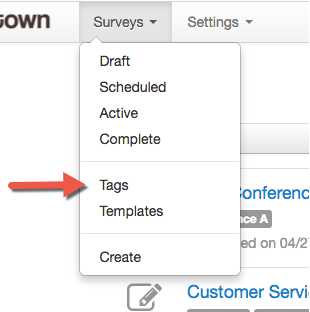
And then you get the to the tags overview screen which allow you to create, edit, or delete tags.

Once you create a tag you can apply them when you create a new survey or even after they are activated or completed.
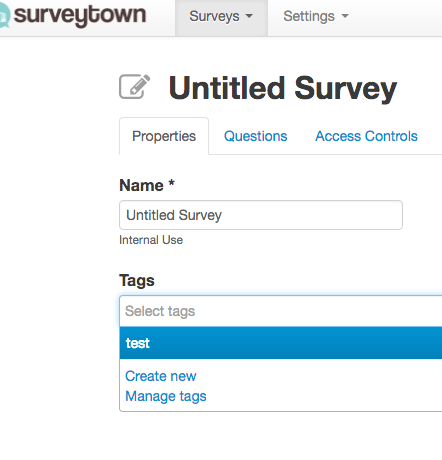
For more you can see our tags help page.
Events unification with Surveys
Since there was not functional different between an “event” and a “survey”, creating an event versus a survey was a purely organizational concept. Since we have now introduced tags, we are leverage the new tagging system to unify the two concepts and get rid of the redundant tabs. If you had any events, we have automatically created and applied an “Event” tag to any of those surveys and now you can find them by filtering on the tag “Event”.
Properties tab added to reports view
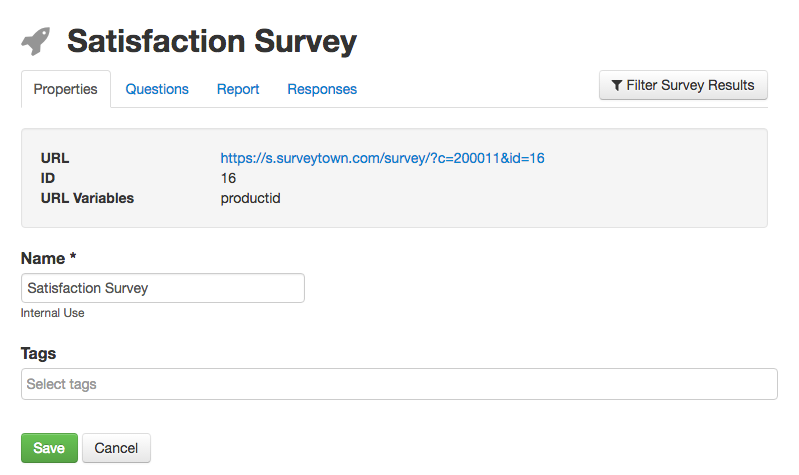
We have added a “Properties” tab in the reports so you can manage the survey tags or edit your survey name and included the information that was normally on the survey overview page such as the survey URL, ID and any URL variables you may have defined.
API additions
For developers out there, we added the ability to create, edit, apply and delete tags to the API.
The Tag related API calls we added are
We also added two other calls changing surveys status and they are.
We hope you enjoy the new features and please feel free to give us any feedback to support(at)surveytown.com.
The post Survey Overview gets an upgrade appeared first on SurveyTown.
]]>The post URL Variables allow you to add custom data to your respondents’ survey responses appeared first on SurveyTown.
]]>Now in SurveyTown you can pass that information to us and we will store that information right along side the survey responses without the user have to type it in themselves. The way we do this is through URL Variables which simply means you can pass us the information “on the link” and we will store it for you when we store the response to allow you to know for example how people who product ABC rated their satisfaction against the customers who bought product XYZ.
So, when you add a URL variable to the link, instead of a survey link looking like this…
https://s.surveytown.com/survey/?c=200011&id=13
The link would have a variable on the end and look like this…
https://s.surveytown.com/survey/?c=200011&id=13&productid=ABC
… where ABC is the would be the product ID of the your product that that customer had purchased in our example. (NOTE: You would need append the product id to you survey link using your email marketing software or dynamically from your application.)
![When you add a variable to a URL, you fill in the information in the brackets with your own data, which is [productid_value] in the above example.](https://surveytown.com/wp-content/uploads/2016/03/URL-variables-creation.png)
Of course the thing you may want to track will be completely different from a product id. Maybe for your business it might be a donor type or zip code. That is totally fine. You can create the variables to track whatever you like AND you can add as many of them into your survey as you need.
Once we collect the information you send us and attach it to the survey you can find your data in the survey exports.
When you add a variable to a URL, you fill in the information in the brackets with your own data, which is [productid_value] in the above example.
What happens after a respondent takes a survey with a URL variable attached to it is we store the information and when you go to download you survey results, your URL variable will be shown along side the survey results.

From there you can slice and dice your data and bring your results to life with data you supplied to us.
Also see: A full tutorial on setting URL Variables on your surveys.
URL variables are a great way to integrate data into your survey responses. This allows you to understand more things about your survey responses by knowing things about who responded right along side their survey responses. This allows you to understand more and make great decisions.
The post URL Variables allow you to add custom data to your respondents’ survey responses appeared first on SurveyTown.
]]>The post How Much It Costs To Create An Online Survey appeared first on SurveyTown.
]]>When you send surveys out to your customers, you can strategically plan and structure your surveys to learn about your customer’s likes, dislikes, preferences and potential desires.
Online survey and polling lets you gather and analyze feedback from your customers so you can fine tune your business offerings.
Knowing that surveys can benefit your business in a number of ways, you probably want to know how much they’re going to cost you.
The costs for online surveys vary depending on your needs. With prices ranging from free to $70 per month, let’s look at how much it costs to create an online survey.
The Basic Free Version
With the free version, you can have one survey going at a time. This version works for very small businesses who don’t need to run multiple surveys. It’s also a nice option if you want to run a survey one time to see how it works for you.
You can pose 10 questions on your survey and collect unlimited responses. The free option also gives you reporting options so you make decisions from the results of your survey.
The Standard Version
At $15 a month, this version gives you the same benefits of the free version with the addition of CSV export options and email notifications so you can make decisions from the results of your survey.
The Professional Version
For just $35 per month, this is a robust options that works for a wide range of business sizes. Everything in the above versions is at your fingertips. Plus, you can set report filters and redirects for your customers after they complete their survey.
Another bonus of this version is the ability to set open and close dates for your survey, and you also have API access.
The Enterprise Version
Big businesses – this $75 per month option is for you. Count on all the features of the versions we’ve discussed thus far, plus you can add more users so more than one person can use the account. You also have access to roles and permissions for added usability.
To Conclude
Now that you know how much it costs to create an online survey, you can start your free trial today.
Worth mentioning, too, is that if you’re an agency, you can use our white label options so you can manage multiple accounts. Choose your skins, create sub-accounts and integrate the product with your domain name.
Ready to get started with your free trial? Start with your free account today, and you can upgrade at any time.
Images: Yoosun Won
The post How Much It Costs To Create An Online Survey appeared first on SurveyTown.
]]>The post New Look for Survey Charts appeared first on SurveyTown.
]]>Multiple Choice Choose Multiple
New Look
Original Look

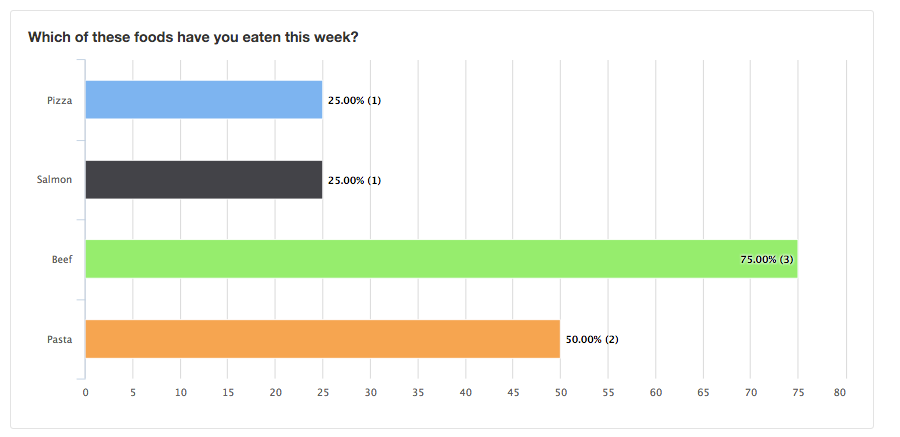
The new look takes shows results in a graphical format so as to quickly understand how many times an option was chosen in relation to other options. There is also a structural change in that the percentage of responses. In the new look the percentages a particular options are chosen are calculated against the number of people who answered the question as opposed to the number of people who took the survey itself. This keeps people who did not respond to the questions from skewing any results.
Multiple Choice
New Look
Original Look
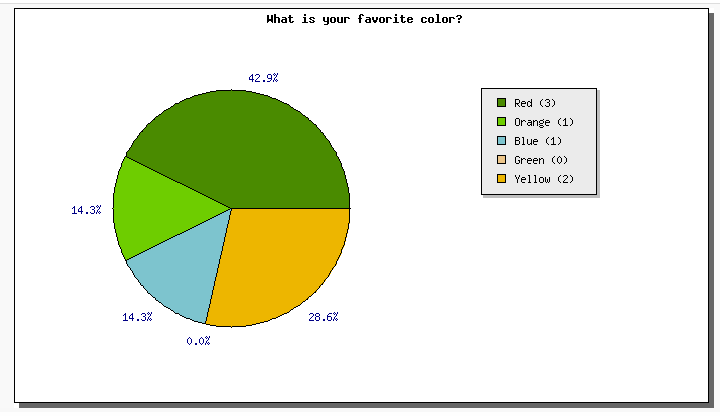
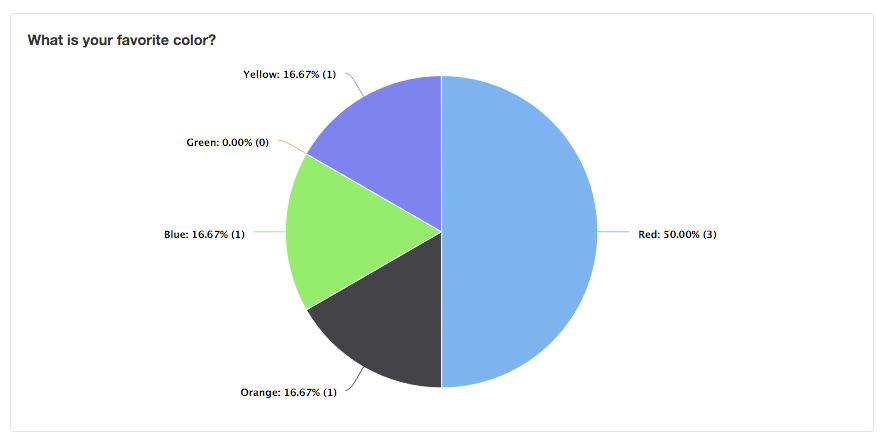
Multiple choice choose one as the more modern new look and feel and the number of times an option what chosen is now represented next to the percentage itself.
Add To Sum
New Look
Original Look
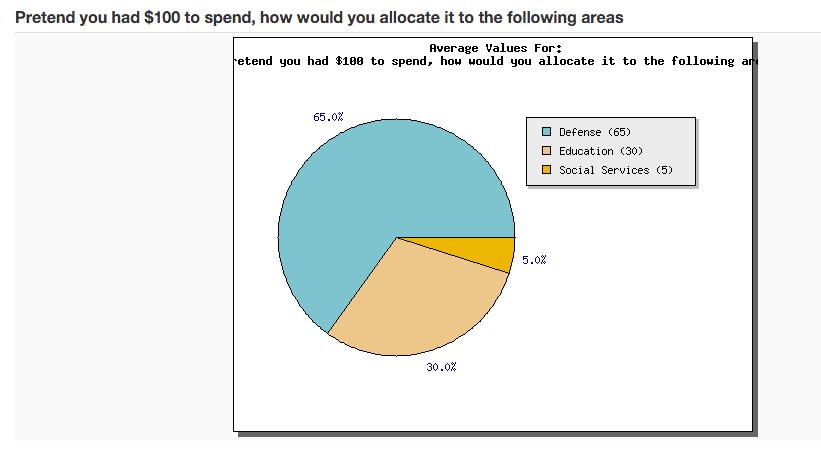
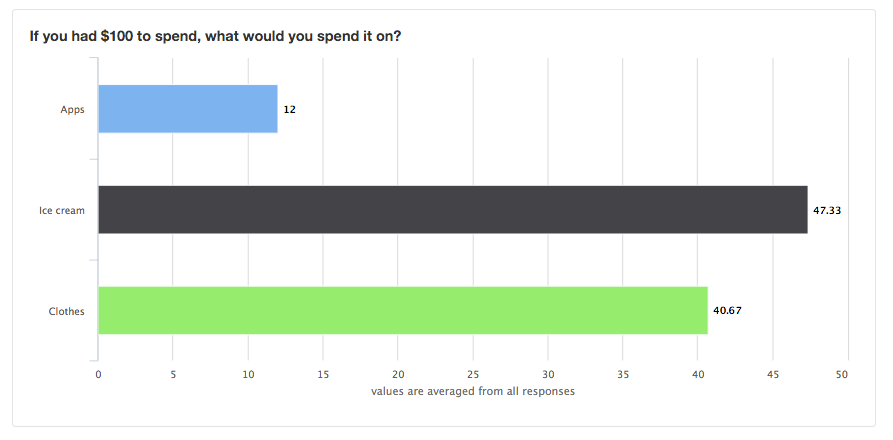
We represented the average values in the Add To Sum reports in bar charts instead of a pie charts because the bar chart does a slightly better job of serving the essential function of Add To Sum which is to compare the choices against one another. Also in Add To Sum, we felt it was less effective think to see the results as a percentage, which is how the pie chart treats it, as opposed to values, which is how a bar chart treats it.
We hope you enjoy the changes. Please feel free to let us know your comments at support at surveytown.com.
The post New Look for Survey Charts appeared first on SurveyTown.
]]>The post White-labeling surveys vs White-label reselling surveys appeared first on SurveyTown.
]]>White-labeling a survey builder usually means you have the ability to:
- Use a generic URL to host the survey – So instead of hosting a survey which has a brandname in it like https://surveytown.com/se2342, for example, the URL will have a generic domain. Ours is “myfeedback.io”.
- Remove any product branding on the survey itself and define non-branded success pages
- Have the ability to add multiple users to one account
White-labeling is generally a service for any organization, especially a larger one, who might not want a customer taking a survey to know that it is hosted at a third party provider. They may also have multiple people in their organization who are running surveys and want to give access to different users to see results.
White-label reselling is quite different in that it includes the features that allow you to brand and resell a product as your own. In addition to the above, white-label reselling features include the ability to:
- Skin the application to show a different brand name – This means replacing the logo and colors inside the application with your own so that it looks like a customized product.
- Create and control new accounts – Generally called sub-accounts, each new sub-account can have one or more users.
- Hide the billing page and redirect users of the application to a reseller’s website
- Customize the powered-by images and landing pages to show your custom brand.
- Change the URL of where surveys are hosted to a branded URL – for example http://surveys.SURVEYRESELLER.com/
- Customize the login URL
In addition, the reseller themselves can control their own sub-account’s ability to:
- Show a generic URL instead of the reseller branded URL
- Remove any product branding on the survey itself and define non-branded success pages (it’s the Reseller brand that is being hidden in this case)
- Ability to add multiple users to their sub-account
The customers who choose white-label reselling are generally people who want to offer the survey product as a product of their own. Here are two examples.
- Product Developers – Companies that integrate surveys into another software or service usually for a specific target niche or software and sell the product as their own.
- Agencies – Companies who may be running surveys on behalf of several other businesses.
Marketing Language
The breakdown of the difference between white-labeling and white-label reselling is important because when getting quotes is important to distinguish. Basically, if a company says they do white-labeling they may or may not include the ability to do white-label reselling.
SurveyTown
SurveyTown includes the ability to white-label and to white-label resell. This means in addition to removing branding in any particular account, you can also rebrand the entire app so that your customers can login to their own separate accounts which you control through a master account.
If you have any questions or would like to discuss which options work best for your company, please reach out to us and we will get back to you right away – https://surveytown.com/support/.
The post White-labeling surveys vs White-label reselling surveys appeared first on SurveyTown.
]]>The post SurveyTown 1.1 Release appeared first on SurveyTown.
]]>Responsively Designed Surveys
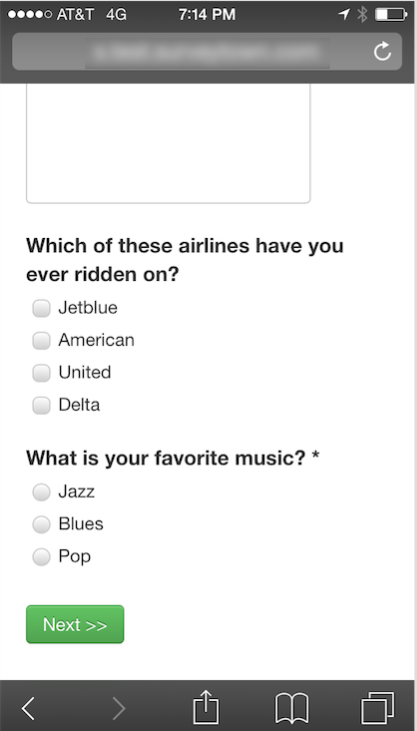
Our new styles offer a much improved experience for respondent who are taking your survey on a mobile device. Responsively designed means your surveys will look great on both a mobile device and a desktop and survey respondents will no longer have to “pitch and expand” to fill in answers on their phone. Here’s a look at the new styles on an iPhone.
New Look-and-Feel for the Interface
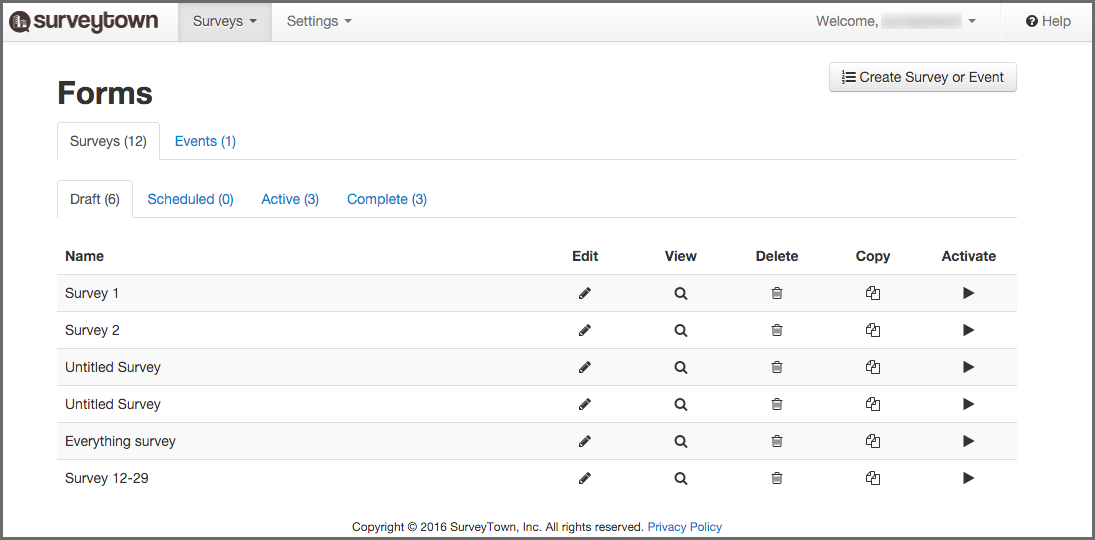
We cleaned up and unified the user experience of SurveyTown. The changes include
- New-Look Tabs
- More Whitespace
- Style Unifications
- Upgraded Icons
- Improved Notifications and Error display
Survey Default Style Changes
Our default styles for surveys changed. We have bolded the question labels, increased font sizes and made more intelligent spacing between questions.
We hope you enjoy the release and if you have any feedback, please feel free to reach out to [email protected]. And happy surveying!
Drew
The post SurveyTown 1.1 Release appeared first on SurveyTown.
]]>